
Roast Turkey Crown with Chestnut, Pear & Bacon Stuffing

Katy Hackforth
Servings

6-8 servings

Prep Time

20 minutes

Calories

600

Cuisine

British

Category

Roast Dinner

For smaller gatherings, a turkey crown is easier and quicker to cook than a whole bird. Latticed bacon keeps the breast moist during cooking. Use your autumn preserves to jazz up the turkey gravy and add sparkle to your Brussels sprouts.


Roast Turkey Crown with Chestnut, Pear & Bacon Stuffing recipe from Four Seasons Cookbook
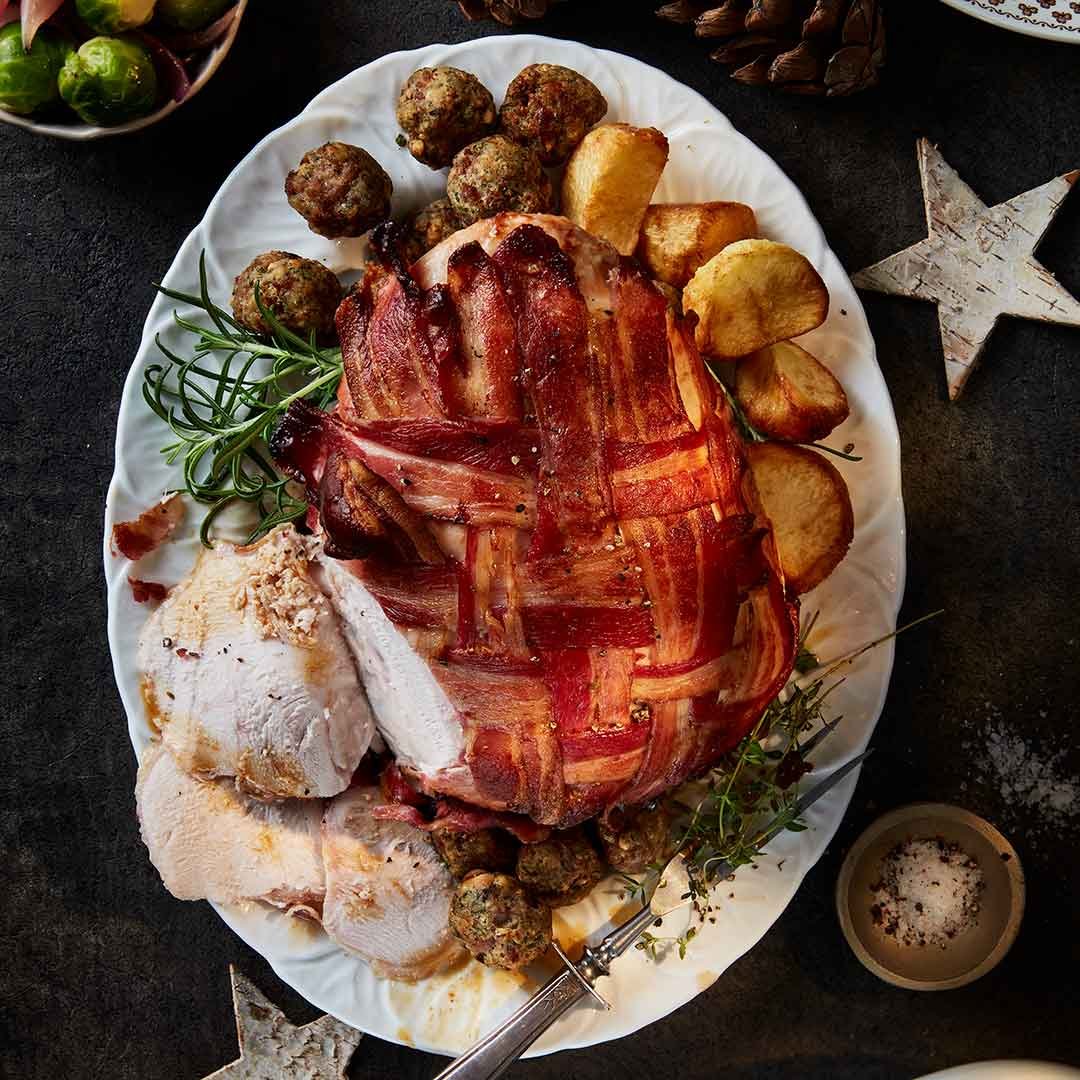
Roast Turkey Crown with Chestnut, Pear & Bacon Stuffing

Ingredients

  • Shallots 6 small, quartered
  • Pears 2 large, peeled, cored and cut into chunks
  • Bacon lardons or thick rashers, snipped 75g (3oz)
  • Fresh parsley 30g pack, woody stems discarded
  • Thyme leaves 2 tsp finely chopped
  • Rosemary 1 tsp finely chopped
  • Butter 75g (3oz), plus extra if greasing a dish
  • Fresh breadcrumbs (brown or white) 225g (8oz)
  • Cooked chestnuts 225g (8oz), roughly chopped
  • Salt and freshly ground black pepper
  • Egg 1, beaten
  • Turkey crown approx. 2kg (4½lb) free-range

  • Thyme leaves 1 tbsp chopped
  • Butter 75g (3oz), softened
  • Lemon 1, grated zest and juice (reserve the lemon halves)
  • Unsmoked streaky bacon 14 rashers
  • Plain flour 3 tbsp
  • Port or red wine 3 tbsp
  • Turkey or chicken stock 450ml (¾ pint), hot

  • Light soy sauce 2 tbsp
  • Elderberry jelly 1 tbsp
  • Find this recipe in the Four Seasons Cookbook

Directions

  1. Make the stuffing in advance, cover and chill for up to 48 hours, or bake and freeze (see tips)
  2. Place the shallots, pears, bacon, parsley, thyme and rosemary in a food processor or blender and blitz briefly until finely chopped but not mushy
  3. Melt the butter in a saucepan, add the shallot and pear mixture and cook for 4-5 minutes to soften slightly

  4. Add the breadcrumbs and chestnuts and mix thoroughly
  5. Season with salt and pepper, then mix in just enough beaten egg to bind the ingredients together
  6. Spoon into lightly greased muffin tins, or into a shallow ovenproof dish, or roll into 20-24 balls to cook alongside the turkey or on a shallow baking tray

  7. Bake for 25-35 minutes or until crisp and hot right through

  8. For the turkey, preheat the oven to 200°C/180°fan/Gas 6

  9. Mix the thyme with the softened butter, lemon zest and juice
  10. Starting from the narrow end of the turkey crown, work your fingers under the skin of the breast to open up a pocket on each side of the breastbone, being careful not to tear the skin
  11. Divide the flavoured butter between the two pockets, spreading it evenly under the skin
  12. Tuck the lemon halves in around the neck cavity
  13. Sit the turkey crown in a small roasting tin and season with freshly ground black pepper
  14. Put the bacon on a board and use the flat side of a knife to stretch the rashers a little
  15. Lay the rashers across the breast to create a lattice (or overlap), covering the whole crown
  16. Roast for about 1 -2 hours: check every 30 minutes, baste occasionally and cover with foil if the bacon is crisping too quickly

  17. To test that the turkey is cooked through, pierce the thickest part with a skewer: the juices should run clear with no traces of pink
  18. Transfer the turkey crown to a serving platter, cover loosely with foil and set aside to rest for 30 minutes
  19. To make the gravy, pour the juices from the roasting tin into a jug and leave to settle
  20. Skim all but 4 tablespoons of the fat from the top, then tip the remaining juices into a saucepan and place over a medium heat until just simmering
  21. Whisk in the flour until the mixture is smooth, then pour in the port or wine and stock and whisk again until smooth
  22. Simmer until the gravy starts to thicken, then add the soy sauce and elderberry jelly
  23. Bring the gravy to a steady boil, adding any additional turkey juices released while the meat was resting
  24. Season to taste then pour into a warmed jug ready to serve with the turkey.

Roast Turkey Crown with Chestnut, Pear & Bacon Stuffing


Leave a comment

Return to blog